Do's And Don'ts of Implementing Elisa Kits
Dec 14th 2022

Do's And Don'ts of Implementing Elisa Kits
The human body is an assimilation of various organic and biological components that function in a highly mechanized form. There are multiple ways in which elaborate studies are conducted to comprehend the functioning of such valuable bodily programs fully. Such analyses and methods help decode the human body's secrets and provide valuable research to fight against numerous diseases and challenges.
Screening methods like ELISA come under the category of elaborative research, which is extensively used in the health sector for diagnostic purposes, particularly for diseases such as:
- HIV
- Rotavirus
- Syphilis
- Zika Virus
- Anaemia
You may know what ELISA kits are, but are you aware of their functionalities and the numerous intricate steps that assure the procedure’s success? Many ELISA kits manufacturers provide substantial instructions along with kits. However, it’s essential to have elaborate academic knowledge. We’ll discuss them in detail below.
What are ELISA kits?
One of the most popular immunoassay techniques, ELISA (enzyme-linked immunosorbent assay), is a convenient and straightforward technique for quantitatively or qualitatively detecting peptides, proteins, antibodies, and hormones in samples. Even though running an ELISA experiment has many benefits, there are some mistakes you should avoid. Customize ELISA kits may also require custom services such as::
- Protein Expression Service
- Peptide Synthesis Service
- Custom Protein Synthesis
- Gene Synthesis
- Antibody Production
- Recombinant Protein Production
Additionally, a reliable, sensitive method for identifying and measuring particular biomarkers in a variety of clinical and research samples is the enzyme-linked immunosorbent assay (ELISA). Many elements, including ELISA pipetting technique, washing, and sample-handling procedures, can alter the accuracy and precision of ELISAs. To help maximize ELISA performance, the specialists have put together a list of recommendations and experimentation suggestions. We will discuss the following:
Tips and Tricks for Elisa Kits
1. Utilize Plates for the Preparation of Dilutions
Most immunoassays call for dilution of the sample to minimize the mod effects or bring the analyte sample assemblage within the assay's detectable range. It is always preferable to arrange adequate standards and controls and place the diluted samples in microtubes or a dilution plate. This minimizes errors and variation in the reproduction time by enabling the careful preparation of dilutions and the speedy transfer of reagents to the plate.
Additionally, consider doing additional dilutions in the neighboring columns of the plates or microtiter tubes using a multifaceted pipetting tool. For instance, dilutions of 1:20 in columns 3 and 5 and beginning dilutions of 1:5 in columns 2 and 4 can be added. Make sure to account for the production of the 1:20 dilution and the addition of all of the 1:5 repetitions to the plate when calculating the volume for your 1:5 dilution.
2. Multichannel Pipette for Reagents on the Assay Plate
To eliminate pipetting mistakes and lower the variance in times from the start of the plate to the finish, using a multichannel pipette often results in increased uniformity. It lessens repeated motion as well.
- Utilize a multipurpose pipetting tool, and prepare the samples in microtiter tubes or a dilution plate before transferring them to their required assay station.
- When adding a reagent to each well, use a multichannel pipette and a different container.
When pipetting, keep an eye on the tip of the pipette to ensure a constant volume is getting drawn to the specific device. Before pipetting, tighten the end, relieve, refill and virtually check to ensure all the tips are drawing the same volume.
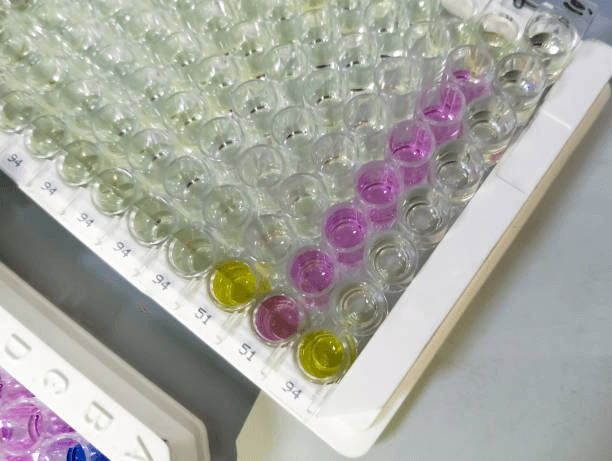
3. Proper Plates for Washing Technique
Increased background pressure, lowered responsiveness, and variability in immunoassays are frequently caused by inadequate washing. It is advised that using a hand-held washing apparatus or an automatic plate washer generates the best results. For many assays, a cleaning container is also acceptable. You can also try the following tricks to achieve the best washing results:
- Automated Washers
Following the kit's usage instructions, program the cleaning capacity, wash intervals, and any sinking stages. Before beginning your experiment, ensure each channel's dispense volume is accurate. - Hand Held Apparatus
When dispensing, overfill the wells and keep the tips away from the wells' bottom surface. When dispensing, pay close attention to each channel to ensure they all work correctly. - Wash Bottles
Use a special bottle labeled with the agent's name or buffer formulation for the wash solution, and clean it with water in between.
Additionally, number the removable stripes on plates that have removable strips before manually washing them. For black stripes, try a shiny silver marker. When decanting reagents, if strips come out, it is simple to replace them in the correct order, guaranteeing accurate data reporting.
4. Proper Pipetting Technique
Pipetting is one of the most crucial aspects of an ELISA procedure. Hence, specific steps must be followed diligently to achieve the best results. They are as follows:
- Throughout the assay technique, use similar fine-tuned pipettes.
- To achieve adequate volume, use a proper pipetting device.
- Before beginning each pipetting step, ensure your pipette is set to the appropriate density, and the tips are firmly on.
- Between agents and test subjects, always use fresh tips.
- Be consistent while applying the forward or reverse pipetting approach to each test stage.
- A small amount from one agent to the next should be used when adding a sample to the buffer. To assure delivery and thorough mixing, the entire amount should be dispensed, and the solution pulled into and removed from the end.
Moreover, reverse pipetting is used while dispersing an agent with a propensity to bubble, such as assay buffers that might contain a surfactant.
5. Sample Handling
Between tests and duplicates, variability can be decreased with improper sample care. When pipetting, thawing, and storing samples, use caution. Before getting the specimen and beginning the procedure, carefully read the assay's directions for usage, as specific kits have unique criteria for sample handling. Thaw samples should be ideally stored at normal temperatures. While keeping the samples, the following steps need to be followed:
- The stability of your target analyte or biomarker should be investigated, and any particular sample handling guidelines supplied in your kit's usage manual should be followed.
- Limit your time in the refrigerator and at room temperature. If you can, keep samples at -70°C to stop the analyte from deteriorating.
- To avoid freeze-thaw cycles, use aliquot samples.
Additionally, when you are pipetting the samples, remember to:
- Swirl samples before being pipetted.
- Before transferring the sample, coat the interior of the pipette tip by drawing the sample in and out repeatedly.
After drawing a sample, check the pipette tip to make sure no droplets are stuck to the outside. Any drops should be cleaned up with a wipe. Be careful to keep your fingers away from the pipette's open end. By doing this, it will be possible to prevent the transfer of any external material and reduce variation between repetitions.
6. Reconstitution of Lyophilized Elisa Reagents
To extend shelf life, numerous kits include lyophilized reagents. A liquid ELISA agent is freeze-dried, heated, and then lyophilized to remove water and turned into a powder. Before usage, lyophilized reagents must be recalibrated with the necessary buffer to produce the final working formulation. The reconstruction process can be achieved through the following steps:
- Utilize the reconstituted shield and capacity specified according to the specified instructions for the particular batch.
- Carefully close the stopper to prevent displacing any substance that is stuck to it.
- Replace the stopper after the reconstitution buffer, then slowly swirl the vial for a few seconds. Inverted the vial three more times to remove any substance that could have dried on the stopper.
- To ensure complete dissolution, let reconstituted reagents stand for half an hour before use unless specified in the instructions.
7. Assay Planning Before the Start of the Process
Before using the ELISA kits, you must assemble the apparatus correctly and plan the steps adequately. Otherwise, the results might be impacted.
- Decide how many samples will be tested, how many replicates will be performed, and how many plates or kits will be needed. The total quantity of models run on a plate can be calculated using any scientific device.
- Check reagent availability and make any necessary buffer preparations in advance.
- Make sure the equipment is accessible, then prepare the necessary assay prototype in the analysis program.
- Choose whether or not to use a dilution plate. Format the assay and dilution plate maps.
- Before beginning the experiment, make all the necessary calculations for agent preparation and dilution of samplings.
- Always have a duplicate of the computations nearby.

8. Note-Making During Assays
A variety of circumstances can impact an assay's results. An adequate lab environment and sample quality assurance are not always easy to maintain. Taking thorough notes during the test will help interpret results if there are any issues.
- Keep track of all the reagents used and concentrations that were utilized.
- Record the tools and settings used for the assay, especially if more than one instrument is available for experimentation.
- Make notes on any unexpected sample appearances or volume restrictions that can impair pipetting accuracy.
- Keep track of any mistakes or departures from the suggested course of action.
- Keep track of any environmental factors that could impact the assay's success.
- Keep a copy of the assay protocol and plate map. Make notes immediately on the plate map, the assay methodology, and the samples.
9. Kit Components
To ensure consistent performance from batch to batch, assays are made up of several elements that are each adjusted and tested individually. Formulations and concentrations for most elements are tailored to specific kits and must be addressed accordingly.
Reagent concentrations may occasionally be tailored for certain kit lots. Interchanging parts from several kits or kit lots aren’t advised. Only the indicated expiration date is supported for ELISA performance. The performance will deteriorate after this time.
- Never combine parts from different tools
- Ask kit makers if you can use a part from a different kit lot. Using an element from another lot may be permissible in some exceptional circumstances.
- Expired reagents should be thrown away to prevent misuse.
10. Kit Instructions
Since each kit is unique, it is strongly advised that you read the instructions before use to ensure any unusual instructions are not overlooked. Use the variety that came with your assay because a kit's usage instructions may change between lots.
- Utilize the kit's instructions that were included in the box.
- Before starting an assay, carefully go through the designated manual.
- Before beginning, make sure you have all the necessary materials.
- Make a note of any agents that require preparation before use.
- Note any unique sample handling instructions and suggested sample dilutions.
- Follow the instructions for agent capacity and incubatory period to the letter.
- Complete all washing procedures.
Things to Avoid While Handling ELISA KITS
1. Don’t Stack the Plates
During incubation, stacking plates may result in the edge effect. When the exterior wells are subjected to different conditions (such as varying temperatures) than their nearby inner wells, it is known as the edge effect, which produces surprising and inconsistent results
It is advised that replicating or even tripling the suitable assay for both the standard and samples to account for wells that the edge effect has impacted. This will enable comparisons to be made when significant discrepancies appear.
2. Plate Overdrying
According to HRP ELISA protocol, the well plate should be inverted, and any remaining fluid should be tapped onto paper towels or other absorbent material. While ensuring that all remaining moisture is gone, you don't want the plate to be fully dry. The active substances on the plate will become inactive when the wells are inactive.
3. Change the Pipette Tip
Although exchanging pipette tips for every replicate is unnecessary, you shouldn’t be doing so when transitioning between several samples or standards. You don't want contamination to taint the outcomes of your experiment!
Never reuse tips or tubes between different samples or standards to prevent cross-contamination.
Implementation of ELISA Kits Methods Ensure Procedural Efficiency
Elisa Kits plays a vital role in determining the biological and organic structure of several components. Ideally, the procedure needs to be as efficient as possible, primarily because of the intricacies involved. Following the tried and tested industry-standard methods for ELISA kits mentioned above, you can garner the best results and ensure that the experimentation and research procedures take place successfully.